


The Windows operating system has strong algorithms to manage and organize folders. While making the best use of Windows Explorer, we still may clutter our storage with duplicate photos and other media files. If you have accumulated a lot of duplicate photos, you can scan and delete RAW duplicate images manually or with the best duplicate photo cleaner for Windows.
The manual process may not free up a lot of space with accuracy. The Best Duplicate Photo Finder for Windows can scan and list out all the duplicate images on the selected storage drive. RAW images take up a lot of space as the file size is always large for RAW and CDR files. Let us figure out the manual and automated processes to delete duplicate RAW files.
Table of Contents
Perform Deduplication of RAW Photos Using Windows Explorer
Windows Explorer is one of the best methods to quickly explore all the photos and albums. You can quickly run through all the albums and deduplicate RAW photos.
Step 1. Press Win + E to access Windows Explorer.
Step 2. Click on the Pictures album from the library and go to the folder you wish to check.
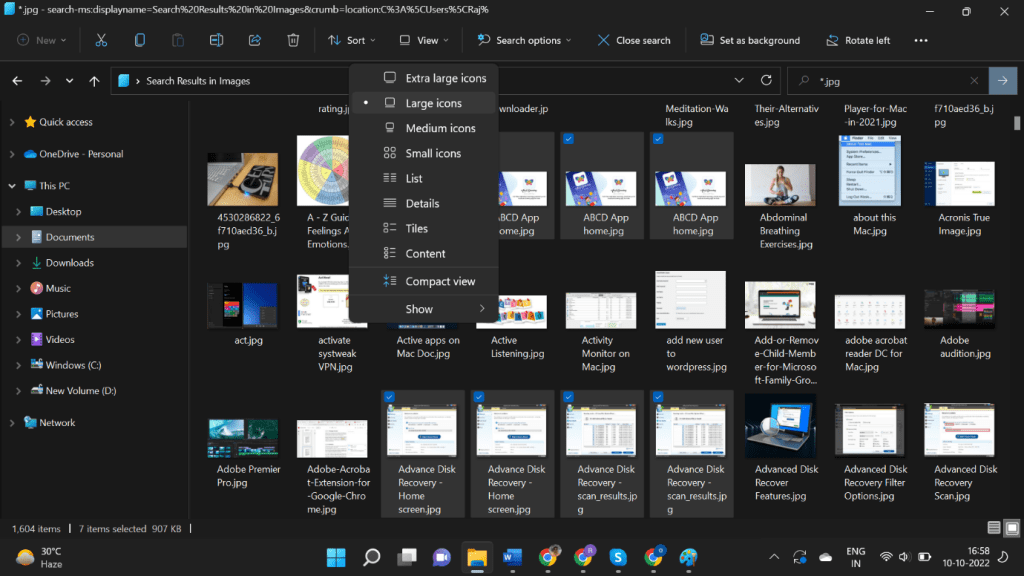
Step 3. Select the ‘Extra Large Icons’ option from the view menu.
Step 4. Scroll through all the images to find duplicate RAW images.
Step 5. Hold down the Ctrl key and click to select multiple images that need to be removed. Once selected, hit the Delete key to send the selected photos to the Recycle Bin. Once you are certain that you have deleted just the right images, you can go to the Recycle Bin folder and delete them permanently from your PC.
Explore RAW Images Using Photos Viewer App
If you are not able to decide which one to delete, you can explore the images on the large screen. Microsoft Photos Viewer app is the default picture explorer app for Windows. You can explore the first image in the folder and then keep browsing through all the images.
Step 1. Press Win + E to access Windows Explorer.
Step 2. Click on the Pictures album from the library and go to the folder you wish to check.
Step 3. Double-click on the first images from the folder to explore them using the Photos Viewer app.
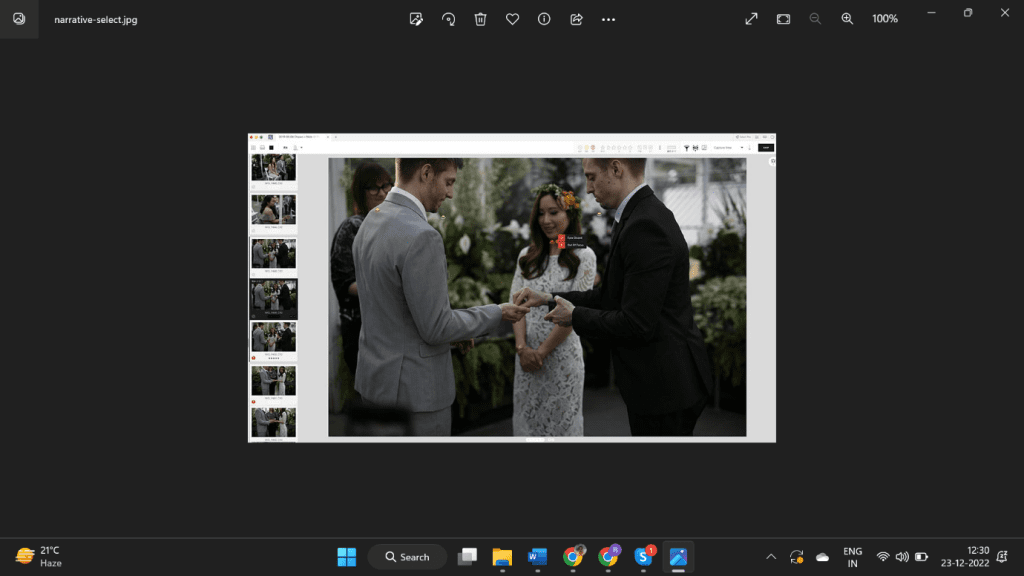
Step 4. Use the Left & Right arrow keys to move next. As you come across a duplicate photo, press the delete key and confirm submission. Do the same with all the found duplicates.
Upload RAW Images to Google Photos
Google Photos app has a distinct feature to avoid uploading similar photos on the cloud drive. It can block exact duplicates from being uploaded to the same album. You can try uploading all the RAW images to the Google Photos drive to identify the unique images.
Step 1. Access your browser and sign in to your Google account.
Step 2. Click on the 9 dots on the top right and click on the Photos app from the Google App menu.
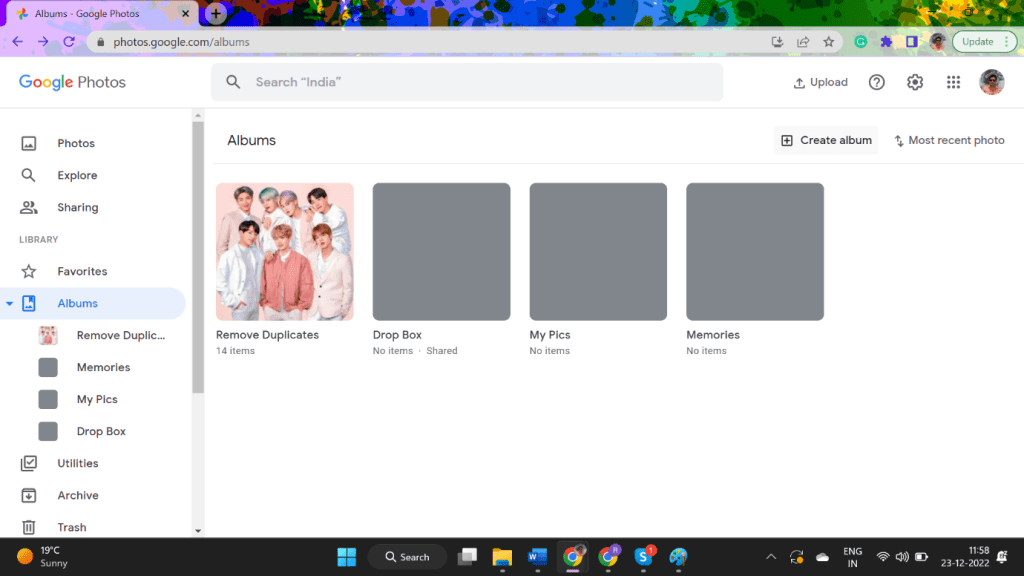
Step 3. Click on the Upload button on the top right to browse and upload images.
Step 4. Browse the album and select the photos that you wish to upload.
Step 5. It will automatically filter out the exact similar images and will only upload unique images. The only constraint here is that it will not identify similar, edited, or cropped images.
Step 6. Check out the number of uploaded images. If the count is lesser than the count of images in your folder, you can figure out that the exact duplicates have been removed.
Now you can rename the original folder and download all the images from Google Photos to your PC. The new folder will only have unique images.
Use Duplicate Image Finder
The best duplicate image finder can help you perform Windows 11 RAW photo deduplication. You can quickly find and delete duplicate RAW images from all the storage devices. Here is one of the best duplicate image finders that we have reviewed.
Duplicate Photos Fixer Pro

Duplicate Photos Fixer Pro is one of the best apps to scan and delete RAW duplicate images. It has an advanced smart algorithm to scan and list out duplicate images. It is compatible with Windows 11 and earlier versions, MacOS, iOS, and Android devices to scan for duplicates. You can perform a quick scan on internal HDD, External SSD, SD Card, Removable drives, or cloud storage drives like Dropbox or Google Drive.
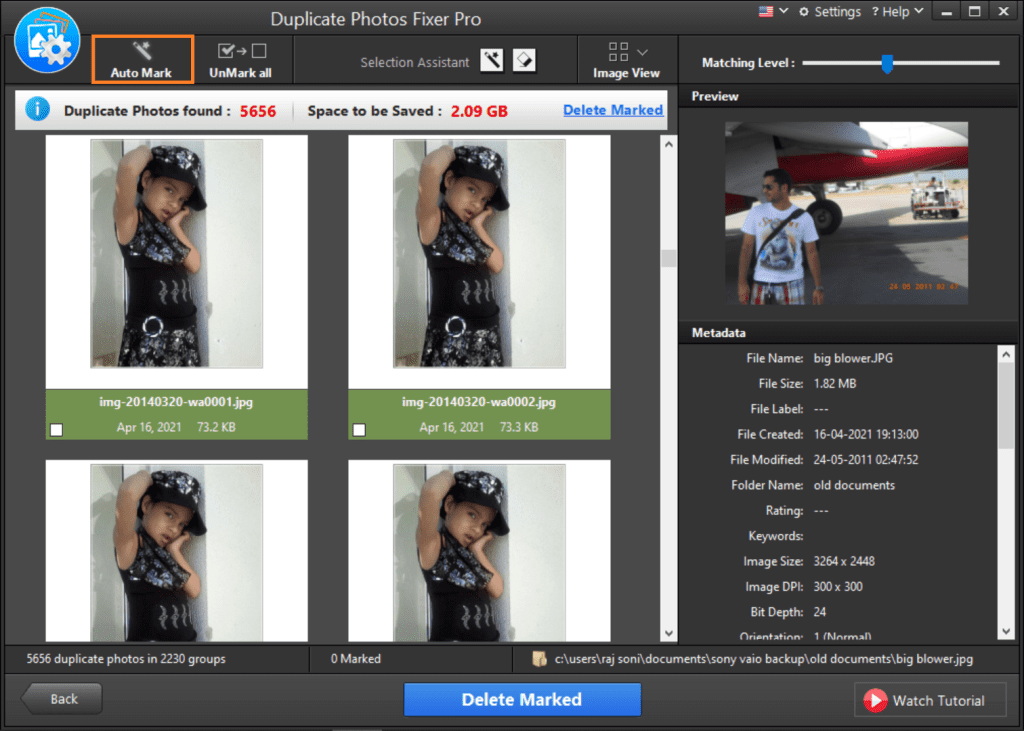
Duplicate Photos Fixer Pro is easy to install and activate. You can quickly download it from the official website and activate the product. Configure the scan modes, settings, and matching levels, and select the drive or device that you wish to scan. Once the scan is complete, it will display a list of duplicate photos. You can preview the found duplicates and select photos manually or click on the Auto-Mark button to select all of them with a single click. Hit the Delete Marked button to perform Windows 11 RAW photos deduplication.
Final Words
This article on how to perform Windows 11 RAW photo deduplication has the best tips and tricks to find and delete duplicate RAW files. The manual methods may not assure accuracy in deleting 100% duplicate photos. You can automate the process of deleting duplicate RAW files with the help of Duplicate Photos Fixer Pro. It can help you quickly scan and delete RAW duplicate images.
Also Read: Complete information on privacy and data protection